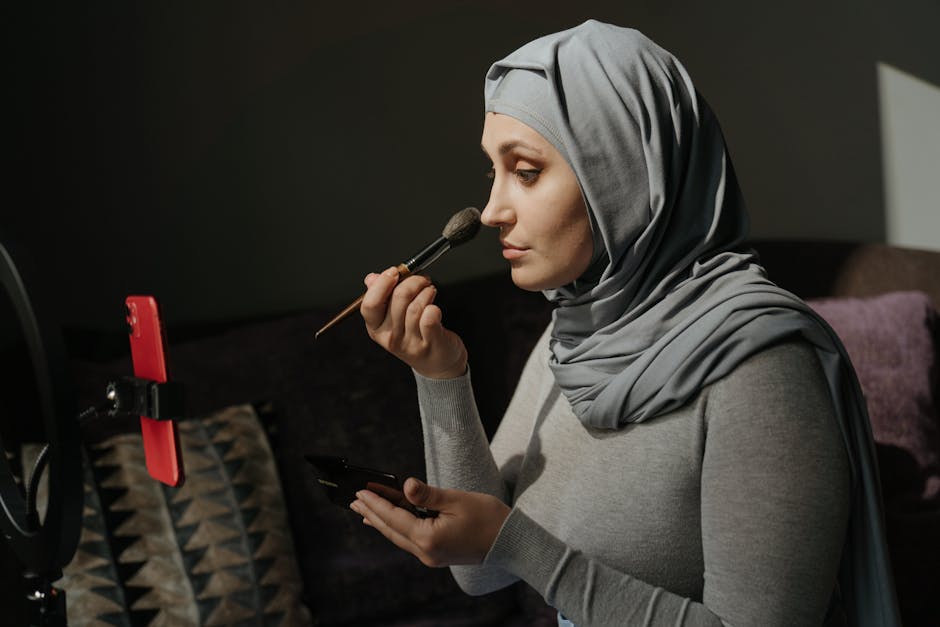
What Is Blush Draping?
Blush draping isn’t new but it’s having a comeback, cleaner and smarter than before. First popularized in the ’70s, this technique used bold color to sculpt the face instead of sinking it back with muddy contour. Now, it’s back in rotation, redesigned for today’s minimalist but intentional vibe.
The idea is simple: use blush to frame and lift. Applied from the apples of the cheeks up toward the temples, it creates shape with tone and texture not product buildup. The result? Skin that looks alive, features that look elevated, without trying too hard.
Modern makeup wearers are done chasing YouTube era cheekbones carved with harsh bronzer. Blush draping offers control and softness at the same time. It builds color and dimension while staying skin positive. Less shadow, more structure. It uplifts rather than hollows out ideal for natural light, HD cameras, and everything in between.
That’s why draping’s not just back it’s replacing contour as the go to sculpting move in 2026 routines. No filters needed.
Choosing the Right Blush Formula
Blush draping isn’t just about placement formula plays a huge role in how smoothly the look comes together. The right texture can mean the difference between a seamless lift and a patchy application. Here’s how to choose what works best for your skin and style preferences.
Cream vs. Powder vs. Hybrid
Each blush formula has its own strengths. The one you choose should complement your desired finish, your skill level, and your skin’s needs.
Cream Blush: Ideal for dry or mature skin, cream formulas melt into the skin and deliver a natural, dewy glow. They’re buildable, easy to blend with fingers, and offer a fresh, skin like finish.
Powder Blush: Best for oily or combination skin, powders offer control and lasting power. Great for layering and pairing with matte finishes.
Hybrid Formulas: Think serum infused liquids and balm to powder tech. These are perfect for multi taskers who want the blendability of creams with the wear time of powders.
Texture Tips by Skin Type
Every skin type benefits differently based on the blush texture:
Oily Skin: Stick with finely milled powders or long wear liquid hybrids that set down to a matte or semi matte finish.
Dry Skin: Cream and balm blushes offer hydration and a smooth glide ideal for preventing texture issues.
Mature Skin: Avoid shimmer heavy formulas that settle into fine lines; stick to satin creams or light gel blends that give a soft focus effect.
Trending Finishes for 2026
Blush finishes in 2026 are all about light manipulation and dimension building. Here are the top trends:
Satin: A classic semi dewy finish that flatters all skin types, giving a soft, healthy radiance.
Sheer Glow: Lightweight, luminous formulas that let your skin texture peek through. Perfect for minimalist, “clean” looks.
Soft Matte: A newer take on matte blush no chalkiness, just a blurred finish ideal for sculpting without harsh lines.
Understanding your formula is the first step in mastering the new wave of blush draping. Once you find your perfect texture and finish, your application becomes smoother, quicker, and more impactful.
Mapping the Face: Key Draping Zones
Done right, blush doesn’t just warm up your face it changes its architecture. The go to move for pros right now? Sweeping blush from the high points of the cheekbones out to the temples. It’s a lift without the scalpel. This technique adds angle, draws the eye upward, and gives your face a fresh, awake energy. It’s subtle, but the impact is sharp.
And here’s where it gets more interesting: blush in the crease. Yes, the eye crease. Artists are pulling in the same blush shade to the outer corner of the eye and above the crease for tonal cohesion and shape. It’s not about looking flushed it’s about sculpting a vibe with color. The transition from cheek to eye creates a seamless visual flow, especially in natural light or minimal makeup days.
Now, placement isn’t one size fits all. Got a round face? Higher placement elongates. Square jaw? Sweep diagonally from apple to hairline to soften those edges. Heart shaped? Keep it mid cheek and feather it out you want to balance, not narrow. The key is knowing your angles and letting the blush follow the landscape, not fight it.
Tools That Make It Easy
Professional looking blush draping isn’t just about the formula your tools shape the final finish. Whether you’re aiming for a sheer daytime tint or sculpted evening dimension, the right tools make all the difference.
Best Brush Shapes for Seamless Blending
When precision and blendability are key, brush shape can elevate your entire routine.
Angled brushes: Ideal for hugging the cheekbones and sweeping color upward toward the temples.
Tapered brushes: Great for concentrated application and soft gradients.
Duo fiber brushes: Provide an airbrushed, feather light finish perfect for layering cream or powder formulas.
Pro Tip: Go softer and fluffier for sheer finishes; denser brushes for saturated color or cream based products.
Fingers vs. Sponges: When Each Shines
Your hands and sponges can be just as helpful as brushes, depending on your goal.
Fingers:
Best for cream or liquid blushes
Natural body heat helps warm and blend product seamlessly
Great for minimal makeup days or targeted color application
Sponges:
Offer a diffused, skin like finish
Useful for building pigment without harsh lines
Ideal for blending multiple layers without disturbing base makeup
Recommendation: Use fingers for maximum control and radiance; reach for sponges when working with longwear or matte textures.
Multi Tasking Products That Double as Blush and Shadow
In 2026, it’s not just about multitasking it’s about intentional crossover. These dual use products are designed to complement draping perfectly:
Cream sticks or pots that can be tapped onto cheeks and lids for monochrome looks
Powder pigments in buildable tones sheer on the eyes, sculpting on the face
Liquid tints that dry down lightweight and last through day to night wear
Look for: Products labeled “eye safe” if doubling up, and aim for tones that balance well with your undertone.
Investing in versatile tools and formulas simplifies your routine while unlocking high impact results.
Shades that Sculpt and Pop
The three shade method is the backbone of modern blush draping base, builder, and blitzer. Think of them as layers, not just colors. The base is your anchor: a subtle hue that matches your natural undertone, often a muted rose, soft terracotta, or peachy beige. The builder is where structure kicks in. Apply it slightly higher and outward to shape the cheekbone try deeper berries or mauves here. Finally, the blitzer adds that intentional flash of saturation right at the cheek’s high point for definition. Coral pinks, high energy reds, or even lavender tones bring personality without the weight of full contour.
Blending warm and cool undertones is all about balance. Neutral skin tones can pull this off with ease, but if you’re leaning warm, keep the base warm and add hints of cool for edge (think warm rose + cool plum). With cool undertones, you can reverse it start with a dusty pink and top with a terracotta or golden flush.
Looking ahead to 2026, timeless pairings still rule rose brown base with berry builder, or peachy earth tones with coral accents. But bold is making noise. Expect people to layer unexpected duos like burnt orange and orchid, or even icy blush pink with rust. It’s not about being loud it’s about knowing where to place contrast and letting color do the lifting quietly, powerfully.
Draping for Day vs. Night
Blush draping isn’t one size fits all. The look transforms easily from fresh and natural to bold and sculpted depending on how and when you wear it. Understanding how to shift your application between day and night is key to mastering this technique.
Daytime Look: The Soft Drape
For daytime, think effortless polish. The goal is to enhance your natural features without looking overly done.
Key Characteristics:
Light diffusion of color along the upper cheekbones
Minimal layering stick with cream or sheer formulas
Blend edges for a barely there flush
Tips for a Clean Girl Finish:
Apply blush after a skin tint or tinted moisturizer for a cohesive base
Use a duo fiber brush for ultra soft application
Choose neutral pinks, soft apricots, or rose tones depending on your undertone
Evening Glam: Intentional Drama
Once the sun’s down, your blush can take center stage. Dramatic draping rewires the face structure, creating angles and an editorial finish.
Key Characteristics:
Richer pigment build up from cheekbones to temples
Bolder shades like berry, plum, or terracotta
Optional crease blending to create eye lift illusion
Pro Tips for Dramatic Draping:
Anchor color toward the temples to lift the face
Pair with bold brows or a statement lip to balance the look
Use powder formulas for longer wear during events
Prepping for Long Wear
Blush finish fades fast unless you lock it in with smart prep.
Make It Last:
Start with a gripping primer under your base
Layer cream blush under powder for double wear time
Lightly mist with setting spray after full application
Whether you’re going for soft and subtle or bold and structured, blush draping adapts beautifully to your schedule and setting. The secret lies in adjusting both the product and placement to match the moment.
Brow Coordination: The Underrated Match
Blush and brows may seem like separate steps in your routine, but when styled with intention, they can work in perfect harmony elevating your entire look.
Why Brow and Blush Balance Matters
Your blush placement shapes your face, and your brows frame it. Without coordination, your features can look disjointed or imbalanced. By syncing these two elements, you help guide the eye across the face more naturally, enhancing structure, symmetry, and polish.
A well balanced brow blush combo can:
Emphasize cheek lift and facial angles
Create a more cohesive makeup look
Soften or sharpen the face, depending on your technique
Tips for Sculpting Sympathetic Brows
To make your brows work with not against your blush shape, keep the following in mind:
Match your brow angle to your blush trajectory. If you’re using a lifted blush application, aim for a brow arch that follows the same upward line.
Avoid overly structured brows when using soft drape blush. Instead, go for a fluffier, natural finish to preserve harmony.
Define the brow tail when working with bolder blush shapes to ensure balance and visual closure.
Learn From the Best
For more precise techniques and brow enhancing hacks, check out:
Brows on Point: Easy Tricks for Symmetry and Definition
When brows and blush are in sync, your face tells a more complete and flattering story. It’s an underrated trick that makes all the difference.
Final Tips from the Pros
Blush placement isn’t painting by numbers. It’s sculpting subtle, strategic, and very alive. Start by blending upward, not outward. Pulling color toward the temples lifts the face instead of dragging it down. And step back. Literally. After a few strokes, look at yourself from a few feet away. It’s the only real way to see balance.
Apply in sheer layers. Build slowly no single swipe should carry the whole weight of the look. This method avoids harsh edges and gives skin that effortless flush. Keep your fingers or brush light; you’re coaxing shape into the face, not stamping it on.
And don’t reach for a blush just because it goes with your shirt. Match your undertone. Cool pink shirt or not if your undertone’s golden, stick with coral, peach, or a rose warm blend. Blush should live with your skin, not compete with your wardrobe.
Use blush to define, not just decorate. When done right, it becomes more than color it becomes bone structure.
 Irmaneliah Dunlp has opinions about trend tracker. Informed ones, backed by real experience — but opinions nonetheless, and they doesn't try to disguise them as neutral observation. They thinks a lot of what gets written about Trend Tracker, Expert Breakdowns, Skincare Routine Innovations is either too cautious to be useful or too confident to be credible, and they's work tends to sit deliberately in the space between those two failure modes.
Reading Irmaneliah's pieces, you get the sense of someone who has thought about this stuff seriously and arrived at actual conclusions — not just collected a range of perspectives and declined to pick one. That can be uncomfortable when they lands on something you disagree with. It's also why the writing is worth engaging with. Irmaneliah isn't interested in telling people what they want to hear. They is interested in telling them what they actually thinks, with enough reasoning behind it that you can push back if you want to. That kind of intellectual honesty is rarer than it should be.
What Irmaneliah is best at is the moment when a familiar topic reveals something unexpected — when the conventional wisdom turns out to be slightly off, or when a small shift in framing changes everything. They finds those moments consistently, which is why they's work tends to generate real discussion rather than just passive agreement.
Irmaneliah Dunlp has opinions about trend tracker. Informed ones, backed by real experience — but opinions nonetheless, and they doesn't try to disguise them as neutral observation. They thinks a lot of what gets written about Trend Tracker, Expert Breakdowns, Skincare Routine Innovations is either too cautious to be useful or too confident to be credible, and they's work tends to sit deliberately in the space between those two failure modes.
Reading Irmaneliah's pieces, you get the sense of someone who has thought about this stuff seriously and arrived at actual conclusions — not just collected a range of perspectives and declined to pick one. That can be uncomfortable when they lands on something you disagree with. It's also why the writing is worth engaging with. Irmaneliah isn't interested in telling people what they want to hear. They is interested in telling them what they actually thinks, with enough reasoning behind it that you can push back if you want to. That kind of intellectual honesty is rarer than it should be.
What Irmaneliah is best at is the moment when a familiar topic reveals something unexpected — when the conventional wisdom turns out to be slightly off, or when a small shift in framing changes everything. They finds those moments consistently, which is why they's work tends to generate real discussion rather than just passive agreement.